Setting Up Your Blog
1. Go to www.Wordpress.com
2. Click "Get Started" in the upper-right corner.
3. Enter your JWU email address (or another email address that you check regularly).
4. Create a user name and a password. Make note of both of these, so you can refer back to them later.
5. Click "create your account."
6. Give your site an address (this is called the "domain"). You can call it anything that you like. This name will become part of the web address that others use of visit your page/site.
7. When you enter your address name, beneath it a number of domain name paid plans will appear. Click "select" by the FREE version. There is no cost associated with your page for this class.
8. After you click "select," Wordpress will once again try to encourage you to buy a package. Don't. At the top of the page, you will see, "Pick a plan that's right for you or start with a free site." You'll notice that "start with a free site is underlined. CLICK THAT.
9. This will take you to the home page of your new account. At the top of the page, you will see, "My Home: Your hub for posting, editing, and growing your site." Just beneath that, you will see "give your site a name." CLICK "NAME YOUR SITE." THIS WILL TAKE YOU TO YOUR GENERAL SETTINGS.
10. Next, enter a site title in the site title box. You may want to do something like this: My <insert the course number that you have with me> Blog (i.e. My ENG 1021 Blog). Whatever you want to place here is fine. This is just an example. Once finished, click "all done and continue."
11. Next, enter your site tag line. This can also be anything you like. For ENG 1021, for instance, you could enter "Exploring the Ideas of Purpose and Audience in Writing." Anything you want to enter here is fine.
12. Next click the pink icon in the upper-right that reads "Save Changes." Once you click this, it will take you to a page titled "My Home."
13. VERY IMPORTANT: At the upper-right side of your home page, you will a section labeled "site set up." This is a list of items THAT YOU MUST FULLY COMPLETE OR YOUR SITE WILL NOT FUNCTION PROPERLY. WHEN YOU CLICK "CONFIRM EMAIL," THE SOFTWARE INSTRUCTS YOU TO GO TO THE EMAIL THAT YOU USED WHEN YOU CREATED YOUR ACCOUNT AND LOOK FOR THE CONFIRMATION EMAIL FROM WORDPRESS. INSIDE THAT EMAIL, YOU'LL SEE AN ICON THAT READS, "CLICK HERE TO CONFIRM." CLICK THAT.
14. Next, return to the "my home" page and go back to the list under "site setup."
15. ALSO VERY IMPORTANT: THE LAST THING YOU NEED TO DO IS TO LAUNCH YOUR SITE. UNTIL YOU DO THIS IT ISN'T VISIBLE TO ME, AND I CANNOT GRADE YOUR BLOG POSTS. AT THE BOTTOM OF THE "SITE SETUP LIST, YOU SHOULD SEE, "LAUNCH YOUR SITE TO THE WORLD." CLICK THAT. WHEN YOU DO, THE CENTER TOP OF YOUR PAGE WILL CHANGE, AND YOU WILL SEE A SECTION TITLED, "LAUNCH YOUR SITE TO THE WORLD." JUST BENEATH THAT IS A HOT PINK ICON THAT READS, "LAUNCH SITE." CLICK THAT.
16. Once you click this, Wordpress will once again attempt to get you to purchase something. DON'T. GO TO THE LAST ITEM ON THE LIST AT THE BOTTOM OF THE PAGE AND SELECT THAT ONE. THAT IS THE COMPLETELY FREE OPTION. CLICK "SKIP PURCHASE."
17. Once again, Wordpress will attempt to get you to buy a plan. DO NOT DO THAT. At the top of the page, you will see, "Choose a plan
Pick one that's right for you and unlock features that help you grow. Or start with a free site. "Start with a free site is underlined. CLICK THAT LINK.
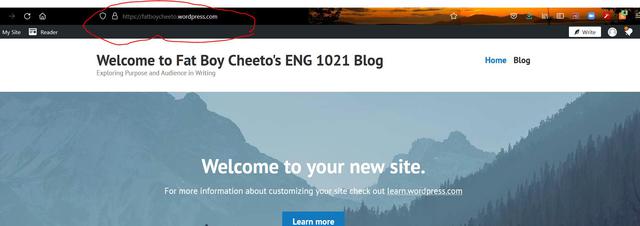
18. At this point, you're almost finished. After clicking the link for the free site in the last step, you will be taken back to the "My Home" page, and you should see that your site is "launched." IN THE UPPER-RIGHT CORNER YOU WILL SEE A SMALL BOX LABELED "VISIT SITE." THIS WILL TAKE YOU TO A VISITOR'S VIEW OF YOUR HOMEPAGE.
Near the top you will see the URL (where the web address is located). In this pic, it is circled in red. Just an FYI, my cat's name is Cheeto, and his nickname is "Fat Boy." He's big-boned :)
19. Click inside the box where the web address is. When you do, this will highlight the entire address. You will need to copy this, so on your keyboard hold down the Control (Ctrl) key and the C key at the same time. This is the keyboard shortcut for "copy."
20. Next, go into your JWU email and create a new email.
In the "to" line enter [email protected]
21. Next, in the body of the email, copy and past the web address that you copied earlier. To do this, simply hold down the Control (Ctrl) Key and V.
22. FOR YOUR SUBJECT ENTER: MY BLOG FOR <ENTER THE NAME OF THE CLASS AND THE CLASS MEETING DATE AND TIME>. EXAMPLE: MY BLOG FOR ENG 1021 MW12:30-1:45.
23. The last step is to send me this email. IT MUST BE SENT TO ME BY THE SECOND CLASS MEETING. IF IT IS NOT, YOU WILL RECEIVE A ZERO FOR EACH BLOG POST THIS TERM.